

How to Use Farberware Coffee Maker: Percolator, Dual Brew & Single Serve

Welcome to the world of Farberware Coffee Makers, a haven for coffee enthusiasts who cherish a quality brew in the comfort of their homes. Farberware, a trusted name in kitchen appliances, offers a range of coffee makers designed to cater to varied brewing preferences. Whether you’re a fan of the robust taste from a stainless steel percolator, crave the versatility of a dual brew coffee maker, or cherish the convenience of a single-serve K Cup machine, Farberware has something for everyone.
In this comprehensive guide, I’ll take you through the ins and outs of using different Farberware coffee maker models. From setting them up right out of the box to brewing that perfect cup of coffee, and even the essential maintenance to keep them running smoothly, we’ve got it all covered. Get ready to elevate your coffee-making skills with expert insights and tips.
Let’s embark on this flavorful journey to brewing perfection with Farberware’s coffee makers!
How to Use Farberware Stainless Steel Percolator
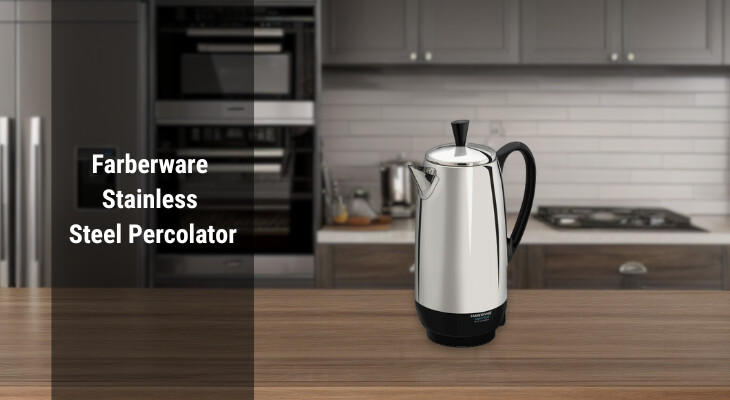
A. Unboxing and Initial Setup
When you bring home a Farberware Stainless Steel Percolator, you’re not just purchasing a coffee maker; you’re investing in a ritual that transforms your everyday coffee experience. Let’s start by setting the stage for your first brew with this elegant machine.
Step 1 – Unbox Your Farberware Percolator
Start by carefully unboxing your new Farberware Stainless Steel Percolator. Inside, you’ll find the main pot, a cover, a brew basket, and a central stem. Each of these components plays a vital role in your coffee-making process.
Step 2 – Get to Know Your Percolator
Take a moment to familiarize yourself with each part of the percolator. Understanding the function of each component is essential for brewing the perfect cup of coffee.
Step 3 – Choose the Ideal Location
Find a suitable spot in your kitchen for your percolator. It should be near an electrical outlet, away from high-traffic areas to avoid accidents, and out of reach of children. Remember, safety first!
Step 4 – Wash Before First Use
Even though your percolator is brand new, it’s important to wash it before the first use. Disassemble the brew basket and lid, and wash them along with the pot in warm, soapy water. Rinse everything thoroughly and dry them. This step ensures that any manufacturing residues are removed and sets the stage for a pure coffee flavor.
Step 5 – Assemble and Prepare for Brewing
Once clean and dry, reassemble your percolator. Now, it’s ready for brewing.
B. Preparing Your Coffee: A Step-by-Step Guide
To ensure your Farberware Stainless Steel Percolator delivers the best cup of coffee, follow these steps:
Step 1 – Choose Cold Water for Brewing
Start by filling your percolator with cold water. Use the water level indicator inside the pot to measure the correct amount. For a full pot, fill up to the 12-cup mark. Remember, using cold water is key for an even and effective brewing process.
Step 2 – Select the Right Coffee Grind
Opt for a coarse grind of your favorite coffee beans. The consistency should resemble breadcrumbs. This grind size ensures that the water percolates through the coffee effectively, capturing the essence without any grittiness.
Step 3 – Measure Your Coffee
The standard ratio is one tablespoon of coffee per cup of water. However, adjust according to your taste preference. If you prefer a stronger brew, add a bit more coffee.
Step 4 – Wet the Brew Basket
Before adding your coffee grounds, lightly wet the brew basket. This helps to prevent coffee grounds from sticking to the sides and promotes even saturation and extraction.
Step 5 – Add Coffee Grounds to Brew Basket
Evenly distribute your measured coffee grounds in the wet brew basket. This ensures that the hot water will evenly percolate through the coffee during brewing.
Step 6 – Assemble the Percolator
Place the stem in the center of the pot, ensuring it fits securely. Then, add the brew basket with coffee on top of the stem.
Step 7 – Secure the Lid
Once the coffee is in place, close the percolator with its lid. Make sure it’s properly secured to prevent any steam from escaping during brewing.
C. Brewing Process
Now that your Farberware Stainless Steel Percolator is prepped and ready, it’s time to delve into the brewing process. This is where the magic happens, transforming water and coffee grounds into a rich, aromatic brew. Follow these steps to ensure your coffee is nothing short of perfect.
Step 1 – Plug In Your Percolator
Connect the percolator to a power outlet. Remember, this model doesn’t have an on-off switch, so plugging it in starts the brewing process immediately. Ensure the cord is safely positioned to avoid any accidents.
Step 2 – Monitor the Brewing Time
The typical brewing time for a full pot (12 cups) in the Farberware Percolator is around 12 minutes, approximately one minute per cup. However, this can vary slightly depending on the model and the amount of water used. Keep an eye on the clock to track the brewing time.
Step 3 – Listen for the Brewing Sounds
One of the unique aspects of using a percolator is the sound it makes. As the water heats up, you’ll hear it percolating through the coffee grounds. Towards the end of the brewing cycle, these sounds will change, indicating that your coffee is almost ready.
Step 4 – Check for Completion
Unlike modern coffee makers, the Farberware Percolator doesn’t have an indicator light to signal the end of brewing. Instead, you’ll know it’s done when the noises quiet down, and no more steam or coffee percolates into the clear knob on the lid.
Step 5 – Safely Unplug the Percolator
Once the brewing is complete, carefully unplug the percolator. Be cautious, as the pot and the brewed coffee will be very hot.
Step 6 – Let the Coffee Settle
Before pouring, give your coffee a minute or two to settle. This allows any grounds that might have made their way through the brew basket to settle at the bottom of the pot.
Step 7 – Pour and Enjoy
Now, it’s time for the best part – pouring and enjoying your freshly brewed coffee. Pour slowly to prevent any stray grounds from ending up in your cup.
D. Cleaning and Maintenance
Taking care of your Farberware Stainless Steel Percolator is essential for maintaining its performance and ensuring the longevity of the device. Regular cleaning not only contributes to better-tasting coffee but also prevents the buildup of residues and oils that can affect the machine’s functionality. Here’s a step-by-step guide to effectively clean and maintain your percolator:
Step 1 – Allow the Percolator to Cool
Before cleaning, ensure the percolator is unplugged and cool to the touch. Handling a hot percolator can be dangerous.
Step 2 – Disassemble the Components
Carefully remove the lid, brew basket, and stem. These are the primary components that come in contact with coffee and water, and they tend to accumulate the most residue.
Step 3 – Wash Removable Parts
Clean the brew basket, stem, and lid with warm, soapy water. Gently scrub them to remove any coffee oils and residue. Rinse thoroughly to ensure no soap remains.
Step 4 – Clean the Pot
Wipe the inside of the percolator pot with a soft sponge or cloth. Avoid using abrasive scrubbers, as they can scratch the stainless steel surface. If there are any stubborn stains, use a mixture of water and baking soda to gently scrub them away.
Step 5 – Rinse and Dry Everything
After washing, rinse all parts with clean water. It’s important to ensure no soap or cleaning agent residue remains. Dry each component thoroughly before reassembling the percolator.
Step 6 – Regular Descaling
Depending on the hardness of your water, it’s recommended to descale the percolator regularly. You can use a descaling solution or a mixture of equal parts water and white vinegar. Fill the pot with this solution and run a brewing cycle, then run two cycles with clean water to rinse.
Step 7 – Inspect for Wear and Tear
Regularly check the cord, plug, and other components for any signs of wear or damage. If you notice any issues, it’s best to address them immediately to prevent further damage or potential safety hazards.
Step 8 – Store Properly
When not in use, store the percolator in a dry place. Ensure it’s unplugged, and the cord is neatly stored to avoid any damage.
By following these steps, you can ensure that your Farberware Stainless Steel Percolator remains a reliable and effective tool in your coffee brewing arsenal for years to come.
How to Use Farberware Dual Brew Coffee Maker

A. Setting Up for First Use
The FarberWare Dual Brew Coffee Maker is a versatile appliance that caters to a variety of coffee preferences, whether it’s a classic pot of coffee or a convenient K-Cup brew. Here’s how to get started with your new coffee maker:
Step 1 – Unpack and Inspect the Appliance
Carefully remove the coffee maker from its packaging. Check all components, including the coffee pot, brew basket, K-Cup holder, and lid, ensuring nothing is missing or damaged.
Step 2 – Choose a Suitable Location
Place your coffee maker on a flat, stable surface near an electrical outlet. Ensure there’s enough clearance above the machine to open the lid comfortably.
Step 3 – Wash the Removable Parts
Before the first use, it’s essential to wash the removable parts. Detach the brew basket, K-Cup holder, and the lid, and wash them in warm soapy water. Be cautious of the sharp needle in the K-Cup holder. Rinse these parts thoroughly and let them air dry.
Step 4 – Install the Water Filter (If Included)
If your model comes with a water filter, soak it in water for about 5 minutes, then rinse it under running water for 60 seconds. Install the filter according to the instructions in the manual.
Step 5 – Fill the Water Reservoir
Locate the water reservoir, typically at the back of the machine. Fill it with fresh, cold water up to the maximum level indicated. Avoid overfilling as this could lead to water overflowing during brewing.
Step 6 – Run a Water Cycle for Cleaning
Before brewing coffee, it’s advisable to run a few water-only cycles to clean the internal system. For the coffee pot side, fill the reservoir, place the empty pot under the brew basket, and start a brew cycle without adding coffee. Repeat this process twice. For the K-Cup side, run at least two cycles with just water, without inserting a K-Cup.
Step 7 – Set Up the Power and Clock (If Applicable)
Plug in your coffee maker and set up the clock if your model includes this feature. This might require consulting the user manual for specific instructions.
Step 8 – Familiarize Yourself with the Control Panel
Take a moment to understand the control panel’s various buttons and functions. This includes the brew button, strength selector, and any other special features your model might have.
This initial setup not only ensures cleanliness but also familiarizes you with the machine’s functionalities.
B. Water and Coffee Ratio
Achieving the perfect cup of coffee with your FarberWare Dual Brew Coffee Maker involves understanding the right balance between water and coffee. This ratio is crucial for extracting the best flavor and strength from your beans. Too much water can lead to a weak, underwhelming cup, while too little water can result in an overly strong or bitter brew. Here’s how to get it right:
1. For the Coffee Pot Side
When using the coffee pot side of the Dual Brew Coffee Maker, you’ll be filling the water reservoir to the desired level, as indicated by the markings. The machine will use all the water in the reservoir for each brew cycle, so measure according to the number of cups you wish to make. For a full pot, fill up to the 12-cup mark.
For brewing with ground coffee, a general guideline is to use one tablespoon of coffee per 6 ounces of water. Adjust this ratio based on your taste preferences. If you prefer a stronger brew, you might add a little more coffee.
2. For K-Cup Brewing
On the K-Cup side, the machine brews the exact amount of water you pour into the reservoir. This means you have to measure the water for each cup you brew. The minimum amount is typically 6 ounces, with markers for 8, 10, and up to 14 ounces for larger cups.
When brewing with K-Cups, the coffee-to-water ratio is predetermined by the K-Cup pod you choose. Different K-Cup flavors and brands may have varying strengths, so you might want to experiment with different water levels to find your preferred taste.
For consistency in your coffee’s strength and flavor, use the same measuring standards for water and coffee every time. Consider using a digital scale for precise measurement, especially for ground coffee.
Don’t hesitate to experiment with the ratios to find what best suits your palate. Coffee is a personal experience, and the perfect cup varies from one individual to another.
C. Using the Coffee Maker and K-Cup Side
The FarberWare Dual Brew Coffee Maker offers the unique advantage of brewing both a classic pot of coffee and single-serve K-Cups. This flexibility makes it an ideal choice for households with diverse coffee preferences. Here’s how to use each side effectively:
1. Using the Coffee Pot Side
Step 1 – Prepare the Coffee Grounds
Place a coffee filter in the brew basket if your model requires one. Add the appropriate amount of coffee grounds, following the ratio of one tablespoon per 6 ounces of water, or as per your taste.
Step 2 – Fill the Water Reservoir
Pour cold water into the reservoir based on the number of cups you want to brew. Use the markings on the reservoir as a guide.
Step 3 – Start the Brewing Cycle
Place the coffee pot on the warming plate. Close the lid and press the brew button. Some models may have options to select brew strength.
Step 4 – Wait for the Brew to Complete
The brewing process will take a few minutes. Once done, the coffee will be kept warm on the warming plate, depending on your model’s settings.
Step 5 – Serve the Coffee
Once the brewing is complete, you can pour and enjoy your coffee. Remember to turn off the machine if it doesn’t have an auto shut-off feature.
2. Using the K-Cup Side
Step 1 – Insert the K-Cup
Lift the lid on the K-Cup side and place a K-Cup in the holder. Ensure it’s properly seated. Be cautious of the sharp needle when placing the K-Cup.
Step 2 – Add Water to the Reservoir
Pour the desired amount of water directly into the reservoir on the K-Cup side. The machine will use all the water added for one brewing cycle.
Step 3 – Choose Your Cup Size
Place your mug on the drip tray. If your model has the option, select the desired cup size or brewing strength.
Step 4 – Start the Brewing Process
Press the brew button designated for the K-Cup side. The machine will begin heating the water and then brew your coffee into the mug.
Step 5 – Enjoy Your Single-Serve Coffee
Once the brewing is complete, remove your mug. Be cautious as the coffee will be hot.
Step 6 – Discard the Used K-Cup
After brewing, lift the lid and remove the used K-Cup. Always be careful as the K-Cup and the holder may be hot immediately after brewing.
Step 7 – Clean the Holder
Regularly clean the K-Cup holder to ensure there’s no buildup of coffee residue or grounds.
Using both sides of your FarberWare Dual Brew Coffee Maker allows you to enjoy the best of both worlds – a full pot for sharing and a single-serve option for a quick, personalized cup.
D. Customizing Your Brew
One of the great features of the FarberWare Dual Brew Coffee Maker is its ability to customize your coffee to suit your individual taste. Whether you prefer a strong, bold cup or a lighter, more delicate brew, this machine offers the flexibility to adjust your coffee’s strength and flavor. Here’s how to tailor your coffee to your preferences:
1. Adjusting Brew Strength for the Coffee Pot Side:
Many FarberWare models come with a feature that allows you to choose the strength of your brew, such as regular, bold, or strong.
To select the brew strength, locate the button or dial on the control panel that adjusts this setting.
Choose the desired option before starting the brewing process. This will alter the brewing time and water flow, affecting the coffee’s extraction and resulting in a stronger or milder brew.
2. Customizing the Cup Size for K-Cup Brewing:
If your model has the feature, you can select the size of your brew on the K-Cup side, such as 6, 8, 10, or 14 ounces. This controls the amount of water used per K-Cup.
Adjusting the cup size can also indirectly alter the strength of your coffee – less water results in a stronger brew, while more water makes it milder.
Experiment with different cup sizes to find the perfect balance for your favorite K-Cup flavors.
3. Experimenting with Coffee Grounds:
For coffee pot brewing, experiment with different types of coffee grounds. Try various roasts, blends, and grind sizes.
Adjust the amount of coffee grounds to fine-tune the strength. Adding more grounds will result in a stronger brew, while using less will make it milder.
4. Using the Reusable Filter for Personalized Blends:
The reusable filter on the K-Cup side allows you to use your own coffee grounds instead of pre-packaged K-Cups.
This option lets you experiment with different coffee varieties and create your own blends, giving you complete control over the flavor profile of your coffee.
5. Temperature Adjustments:
Some FarberWare models allow you to adjust the brewing temperature. A higher temperature can extract more flavor and caffeine, resulting in a stronger brew.
If your model has this feature, experiment with different temperature settings to see how it changes the taste of your coffee.
6. Keeping Notes:
As you experiment with different settings and coffee types, keep notes on your favorite combinations. This will help you replicate the perfect cup every time.
Customizing your brew with the FarberWare Dual Brew Coffee Maker is all about experimentation and discovering what you love. By adjusting brew strength, cup size, coffee grounds, and temperature, you can refine your coffee experience to perfectly match your taste preferences.
E. Maintenance and Cleaning
Proper maintenance and regular cleaning are crucial for ensuring that your FarberWare Dual Brew Coffee Maker continues to function efficiently and produce great-tasting coffee. Here’s a comprehensive guide to keeping your machine in top condition:
1. Daily Cleaning After Use
After each use, remove and rinse the brew basket and K-Cup holder to remove coffee grounds and residue.
Wipe down the exterior of the machine with a damp cloth to keep it clean and free of spills or stains.
For the coffee pot, wash it with warm soapy water or place it in the dishwasher if it’s dishwasher-safe.
2. Weekly Cleaning Routine
Once a week, deep clean the removable parts, including the brew basket, K-Cup holder, and carafe. Use warm soapy water for thorough cleaning.
Check and clean the area around the coffee outlet where coffee is dispensed into the pot or mug. Coffee oils can accumulate here and affect the taste of your brew.
3. Descaling the Coffee Maker
Depending on the hardness of your water, descale your coffee maker every 3 to 6 months. Hard water can cause mineral buildup, affecting the machine’s performance and coffee taste.
Use a descaling solution or a mixture of equal parts white vinegar and water. Fill the water reservoir with this solution and run a brew cycle, then run two or three cycles with plain water to rinse.
If your machine has a descaling program, follow the instructions in the user manual to run this cycle.
4. Cleaning the Needles
The needles that pierce the K-Cups can become clogged with coffee grounds. Use a paperclip to carefully remove any debris from the needles.
Some models have a needle cleaning tool. If yours does, use it according to the instructions in the manual.
5. Checking and Replacing the Water Filter
If your machine has a water filter, replace it every two months or as recommended in the user manual.
Regularly changing the water filter ensures better tasting coffee and can help prevent scale buildup.
6. Storing the Coffee Maker
When not in use for extended periods, empty the water reservoir and keep the lid open to allow the interior to dry out.
Store the machine in a dry place to prevent mold and mildew growth.
7. Troubleshooting Common Issues
Consult the user manual for troubleshooting common problems like the machine not brewing, leaking, or producing coffee that doesn’t taste right.
Regular maintenance can often prevent these issues, but if they persist, contact FarberWare customer service for assistance.
Regularly maintaining and cleaning your FarberWare Dual Brew Coffee Maker not only extends its lifespan but also ensures that every cup of coffee it brews is as delicious as the first.
How to Use Farberware (K Cup) Touch Single Serve Coffee Maker

A. Overview and Initial Setup
The Farberware (K Cup) Touch Single Serve Coffee Maker offers a convenient and fast way to enjoy your favorite coffee, one cup at a time. Ideal for busy mornings or when you need a quick pick-me-up, this coffee maker is designed for ease of use and efficiency. Here’s how to set it up for the first time:
Step 1 – Unpack and Inspect Your Coffee Maker
Carefully remove the coffee maker from its packaging. Check for all essential components, including the water reservoir, drip tray, and K-Cup holder. Ensure that everything is intact and there are no visible damages.
Step 2 – Choose the Right Location
Place your coffee maker on a stable, flat surface near a power outlet. Ensure there’s enough space above and around the coffee maker for easy access and operation.
Step 3 – Remove All Packaging Materials
Before using your coffee maker for the first time, remove all packaging materials, stickers, and plastic films from the machine.
Step 4 – Clean Before Use
Wash the removable parts, like the drip tray and the K-Cup holder, in warm soapy water. It’s essential to clean these components to ensure there’s no residue or dust from packaging and shipping.
Step 5 – Install the Water Reservoir
Locate and fill the water reservoir. Most models have clear level markings to guide you on how much water to add, depending on the cup size you’re planning to brew.
Step 6 – Power Up the Coffee Maker
Plug in your coffee maker and switch it on. The Farberware model typically features a user-friendly touch screen or button interface that lights up when the machine is powered.
Step 7 – Run a Water Cycle for Initial Cleaning
Before brewing your first cup of coffee, it’s advisable to run a water-only cycle. Place a mug on the drip tray, select the largest cup size available, and run the cycle without inserting a K-Cup. This helps clean out the system and ensures that your first cup of coffee is fresh and free of any residue.
Step 8 – Familiarize Yourself with the Touch Interface
Take a moment to understand the touch interface, including the power button, brew size selection, and any other features your model offers. This understanding is crucial for customizing your coffee experience.
With these steps, your Farberware (K Cup) Touch Single Serve Coffee Maker is now ready to brew your first cup.
B. Brewing Your First Cup
Once your Farberware (K Cup) Touch Single Serve Coffee Maker is all set up, it’s time to brew your first cup of delicious coffee. This process is straightforward, but following these steps ensures you get the best possible cup every time:
Step 1 – Select Your Favorite K-Cup Pod
Choose a K-Cup pod that suits your taste. There are a wide variety of flavors and brands available, so you can explore different options to find your favorite.
Step 2 – Insert the K-Cup Pod
Open the lid of the coffee maker and place the K-Cup pod in the holder. Ensure it’s properly seated and the lid is securely closed. The machine won’t operate unless the lid is properly closed for safety.
Step 3 – Fill the Water Reservoir
Add fresh, cold water to the reservoir. The amount of water you add determines the size of your coffee. Most Farberware models have clear markings for different cup sizes – 6, 8, 10, or 14 ounces.
Step 4 – Place Your Mug on the Drip Tray
Position your mug on the drip tray. Make sure it’s centered to catch the coffee as it brews.
Step 5 – Select the Cup Size
If your model offers different brewing sizes, select the desired option on the touch screen or button panel. This choice will dictate the amount of water used and the strength of your coffee.
Step 6 – Start the Brewing Process
Press the brew button to start. The coffee maker will first draw the required amount of water, heat it, and then begin brewing your coffee through the K-Cup.
Step 7 – Wait for the Brew to Complete
The brewing process typically takes a few minutes. The machine will dispense hot coffee into your mug. Wait until the brewing process is entirely complete before removing your mug.
Step 8 – Enjoy Your Coffee
Once the coffee is brewed, carefully remove your mug from the drip tray. The coffee will be hot, so handle it with care.
Step 9 – Eject the Used K-Cup
After brewing, lift the lid and remove the used K-Cup. Discard it responsibly. Be cautious, as the area around the K-Cup holder may be hot immediately after brewing.
Step 10 – Clean After Use
To keep your machine in good condition, it’s a good practice to remove and rinse the K-Cup holder and drip tray after each use.
Brewing my first cup with the Farberware (K Cup) Touch Single Serve Coffee Maker was a simple and satisfying experience. With the convenience of K-Cup pods and the efficiency of the machine, you too will enjoy a perfect cup of coffee whenever you like.
C. Using Coffee Grounds
While K-Cups offer convenience and variety, the Farberware (K Cup) Touch Single Serve Coffee Maker also gives you the option to brew coffee using your own grounds. This is a great way to enjoy your favorite coffee blends or to brew a cup when you’re out of K-Cups. Here’s how to do it:
Step 1 – Utilize the Reusable Coffee Filter
Your coffee maker should come with a reusable filter specifically designed for brewing with coffee grounds. Locate this filter and make sure it’s clean before use.
Step 2 – Measure Your Coffee Grounds
The key to a good cup of coffee is the right amount of coffee grounds. A general guideline is to use one tablespoon of grounds for every six ounces of water. However, you can adjust this to suit your taste.
Step 3 – Fill the Filter with Coffee Grounds
Place the measured coffee grounds into the reusable filter. Make sure not to overfill it, as this can lead to over-extraction or spillovers during brewing.
Step 4 – Insert the Filter into the Coffee Maker
Place the reusable filter with the coffee grounds into the compartment where you would normally insert a K-Cup. Ensure it is properly seated and secure.
Step 5 – Add Water to the Reservoir
Fill the water reservoir with fresh, cold water to the desired level. Remember, the amount of water you add is the amount of coffee you will get.
Step 6 – Place Your Mug and Brew
Position your mug on the drip tray and select the cup size based on the amount of water you added. Press the brew button to start the brewing process.
Step 7 – Wait for the Coffee to Brew
The brewing time might vary slightly when using coffee grounds compared to a K-Cup. Wait until the brewing process is fully completed before removing your mug.
Step 8 – Enjoy Your Coffee
Once the brewing is done, carefully remove your mug. You now have a freshly brewed cup of coffee from your own grounds.
Step 9 – Clean the Reusable Filter
After brewing, it’s important to clean the reusable filter. Remove it from the coffee maker, discard the used grounds, and rinse the filter thoroughly.
Step 10 – Occasional Deep Cleaning of the Filter
Over time, coffee oils can accumulate in the filter. Periodically, give it a deep clean using warm soapy water or place it in the dishwasher if it’s dishwasher-safe.
Brewing with my own coffee grounds in the Farberware (K Cup) Touch Single Serve Coffee Maker not only offers flexibility in my coffee choices but also lets me explore a broader range of flavors and blends, making my coffee experience even more personalized and enjoyable.
D. Advanced Features
The Farberware (K Cup) Touch Single Serve Coffee Maker is equipped with several advanced features that enhance its functionality and your brewing experience. Understanding these features will allow you to make the most out of your coffee maker:
1. Touchscreen Interface: Many models come with an intuitive touchscreen interface, making it easier to control various functions. This interface allows you to select cup sizes, brew strength, and more with just a touch.
2. Adjustable Brew Strength: Some models offer the option to adjust the strength of your brew. This feature is perfect for when you want a stronger cup of coffee or prefer a lighter brew. Experiment with these settings to find your ideal coffee strength.
3. Temperature Control: Temperature plays a crucial role in extracting the perfect flavor from your coffee grounds. Advanced models may offer the ability to adjust brewing temperature, giving you more control over the taste and quality of your coffee.
4. Auto Shut-Off Function: For safety and energy efficiency, many Farberware coffee makers come with an auto shut-off feature. This function automatically turns off the coffee maker after a set period of inactivity, ensuring safety and saving energy.
5. Programmable Settings: Some models may offer programmable settings that allow you to set up your coffee maker to brew coffee at a specific time. This means you can wake up to a freshly brewed cup of coffee every morning.
6. Maintenance Reminders: Advanced models might include maintenance reminders that alert you when it’s time to clean or descale your machine. This feature helps in maintaining the longevity and performance of your coffee maker.
7. Customizable User Profiles: If your machine has this feature, it allows multiple users to save their preferred brewing settings. This is particularly useful in a household with diverse coffee preferences.
8. Water Filtration System: Some models are equipped with a built-in water filtration system to ensure that the water used for brewing is clean and free of impurities, which can significantly affect the taste of your coffee.
Take full advantage of these advanced features to tailor your coffee brewing experience to suit your preferences.
E. Cleaning and Maintenance
Regular cleaning and proper maintenance are key to ensuring that your Farberware (K Cup) Touch Single Serve Coffee Maker continues to function efficiently and produce high-quality coffee. Here are essential steps and tips to maintain your machine:
1. Daily Cleaning
After each use, remove and rinse the K-Cup holder to clear any residual grounds or liquid.
Wipe the area around the coffee outlet and the machine’s exterior with a damp cloth to keep it clean and free of spills.
Empty and rinse the drip tray and its cover, especially if there are any spills or splashes.
2. Weekly Deep Cleaning
Once a week, thoroughly clean the water reservoir, drip tray, and K-Cup holder. Use warm soapy water, rinse well, and let them air dry.
Use a soft, damp cloth to clean the machine’s exterior and touchscreen. Avoid using abrasive cleaners or pads that can scratch the surface.
3. Descaling the Coffee Maker
Depending on your usage and water hardness, descale your Farberware coffee maker every 3-6 months. Descaling removes mineral buildup that can affect the machine’s performance and coffee taste.
Use a commercial descaling solution or a mixture of equal parts white vinegar and water. Fill the reservoir with this solution and run a brew cycle without a K-Cup. Then, run two more cycles with fresh water to rinse.
4. Cleaning the Needles
Periodically check and clean the needles that pierce the K-Cup. Coffee grounds can clog these needles over time.
Turn off and unplug the coffee maker. Use a paperclip to gently remove any debris from the needles. Be careful, as the needles are sharp.
5. Checking and Replacing Parts
Regularly inspect the coffee maker for any worn or damaged parts, especially the power cord and plug.
If you notice any malfunction or deterioration, contact Farberware customer service for replacements or repairs.
6. Avoiding Calcium Buildup
If you live in an area with hard water, consider using bottled or filtered water to minimize calcium deposits.
Regular descaling is particularly important in hard water areas.
7. Storing the Coffee Maker
If you won’t be using the coffee maker for an extended period, empty the water reservoir and leave it open to air dry.
Store the coffee maker in a dry place, away from dust and moisture.
We’ve journeyed through the intricate details of operating and maintaining various Farberware coffee makers – from the classic Stainless Steel Percolator to the versatile Dual Brew Coffee Maker, and the convenient K Cup Touch Single Serve Coffee Maker. Each model offers a unique brewing experience, catering to different preferences and lifestyles.
To recap, we explored:
– The traditional brewing method of the Stainless Steel Percolator, perfect for those who appreciate the rich, robust flavor of percolated coffee.
– The Dual Brew Coffee Maker’s flexibility, which allows for brewing a full pot or a single K-Cup, ideal for households with diverse coffee tastes.
– The convenience and speed of the K Cup Touch Single Serve Coffee Maker, a great fit for busy individuals or those who enjoy a quick, hassle-free cup of coffee.
Remember, the key to consistently great coffee lies in understanding your coffee maker’s features and maintaining it well. Regular cleaning and descaling not only prolong the lifespan of your machine but also ensure the best flavor extraction from your coffee.
Whether you’re a seasoned coffee aficionado or a newcomer to the world of home-brewed coffee, Farberware’s range of coffee makers can elevate your daily coffee ritual. By following the guidelines we’ve discussed, you can enjoy delicious, barista-quality coffee at home, every day.
Experiment with different blends, explore the various settings of your machine, and most importantly, savor each cup.
FAQ
1. How do you program a Farberware dual brew coffee maker?
To program the Farberware dual brew coffee maker, first ensure the correct time is set using the hour and minute buttons. Remember, the time must be set before programming the auto brew feature. To program, press the program button and use the hour and minute buttons to set the desired start time for brewing. Ensure it displays AM or PM correctly. After setting the time, press the auto button to save the setting. The auto light should be lit, indicating the program is set. Note that programming is only possible for the carafe side, not for the K-cup side.
2. Do K cups work in Farberware coffee maker?
Yes, K cups are compatible with certain Farberware coffee maker models, such as the Farberware K-Cup and Brew Stainless and Black 201615. This model is designed to accommodate both K cups and ground coffee, offering versatility in brewing options.
3. How do you use a Farberware superfast coffee maker?
To use the Farberware Superfast Coffee Maker, start by filling it with cold water up to the desired level indicated inside the pot. Insert the stem into the pot and place the brew basket on top of the stem. Wet the brew basket, then add the desired amount of coffee grounds directly into it. Cover the brew basket with its lid and close the coffee maker with its main lid. Plug in the coffee maker to start brewing; there is no on/off switch. The brewing process takes about a minute per cup. Once brewing is complete, indicated by the cessation of noise, the coffee is ready to serve. The coffee will stay hot as long as the maker is plugged in.