How To Make Coffee: A Guide to 10 Popular Coffee Brewing Methods
Coffee is a staple beverage for many people, providing a much-needed boost of energy to start the day or help power through long afternoons. With so many methods to choose from, it can be overwhelming to decide how to make the perfect cup of coffee. This guide will break down 10 popular methods for making coffee.
For each method, I’ll cover what you need, how to make coffee using it, the pros and cons, and tips for getting the best results. Whether you’re a seasoned barista or just starting to explore the world of coffee, this guide is sure to help you make the perfect cup every time.
Method 1: Using a Drip Coffee Maker
What You Need
- A drip coffee maker
- A coffee filter (Size #2 Coffee Filter for 2-6 cups; size #4 Coffee Filter for 8-12 cups)
- Coffee grounds
- Hot water
- Measuring scoop/coffee mug (optional, but recommended to measure the right amount of coffee and water)
How To Make Coffee Using a Drip Coffee Maker
- Fill the water reservoir with fresh water up to the desired level.
- Place a coffee filter in the basket and fill it with the preferred amount of coffee grounds (typically 1 to 2 tablespoons per cup).
- Turn on the coffee maker and wait for it to heat up and start brewing.
- Once brewing is complete, pour the coffee into a mug and enjoy!

Pros and Cons of Using a Drip Coffee Maker to Make Coffee
Pros:
- Easy to use and set up.
- Makes a consistent and good-tasting cup of coffee.
- Available in different sizes and styles to fit any kitchen.
Cons:
- May produce a bland taste if the coffee grounds are not of good quality.
- Can take up counter space.
- May require regular cleaning and maintenance.
Tips When Using a Drip Coffee Maker to Make Coffee
- Use freshly roasted coffee grounds for the best taste.
- Experiment with different grind levels to find your perfect cup.
- Clean your coffee maker regularly to maintain its performance and prevent stale-tasting coffee.
- Preheat your mug before brewing to keep your coffee hot for longer.
Method 2: Using a French Press
What You Need
- A French press
- Coffee grounds
- Hot water
- A coffee mug
- A thermometer/a timer (optional, but helps ensure that you brew the coffee for the right amount of time and at the right temperature)
How To Make Coffee Using a French Press
- Boil water to the desired temperature (around 200°F).
- Place the preferred amount of coffee grounds in the French press (typically 1 to 2 tablespoons per cup).
- Pour the hot water over the coffee grounds and let it steep for 4 minutes.
- Slowly press the plunger down to separate the coffee grounds from the liquid.
- Pour the coffee into a mug and treat yourself!

Pros and Cons of Using a French Press to Make Coffee
Pros:
- Easy to use and produces a rich, full-bodied coffee.
- Can be used to make hot or iced coffee.
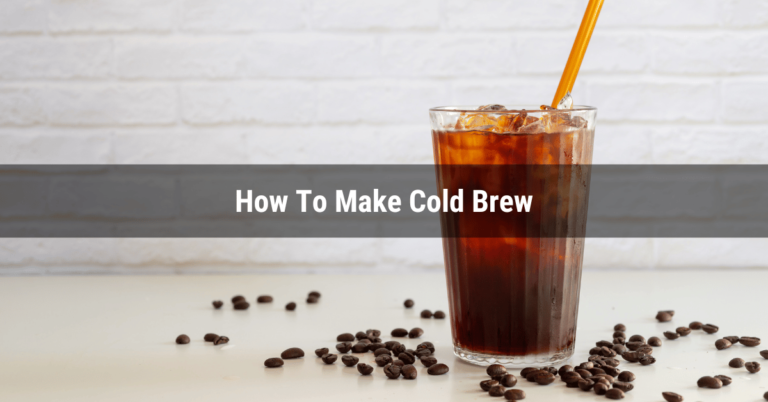
- Can be used to make Cold Brew.
- Available in different sizes to fit any kitchen.
Cons:
- Can produce a sediment-filled cup of coffee if the coffee grounds are not fine enough.
- Can take longer to clean compared to other methods.
- May require a certain level of skill and experience to make the perfect cup of coffee.
Tips when Using a French Press to Make Coffee
- Use coarse coffee grounds to prevent the sediment from seeping through the press.
- Experiment with different steeping times to find your perfect cup.
- Preheat the French press before brewing to keep the coffee hot for longer.
- Clean the French press after each use to prevent flavor transfer and buildup.
- Try adding spices/flavors to the coffee grounds for a unique taste.
Looking to perfect your French press brewing technique? Check out our guide on ‘How To Use A French Press‘ for expert tips and tricks
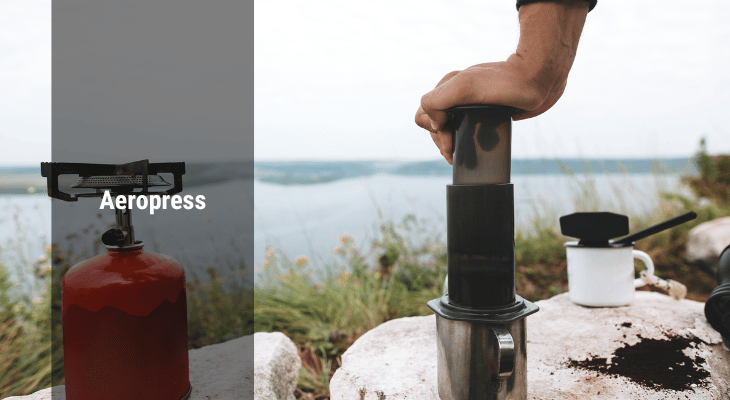
Method 3: Using an Aeropress
What You Need
- An Aeropress
- Coffee grounds
- Hot water
- A coffee mug
- A scale (optional, but useful for measuring the right amount of coffee grounds)
- A thermometer/a timer (optional, but helps ensure the water is at the right temperature and steeping time)
How To Make Coffee Using an Aeropress
- Boil water until it reaches a temperature of around 200°F.
- Measure out the required amount of coffee grounds (typically 15-17g for one cup).
- Assemble the Aeropress by placing the filter in the cap and screwing it onto the chamber.
- Place the Aeropress on top of the coffee mug and add the coffee grounds.
- Pour the hot water over the coffee grounds and stir gently.
- Wait for 1 minute to allow the coffee to steep.
- Push the plunger down gently to separate the coffee grounds from the liquid.
- Pour the coffee into the mug and enjoy!
Pros and Cons of Using an Aeropress to Make Coffee
Pros:
- Easy to use and produces a clean, smooth coffee.
- Can make both hot and cold coffee.
- Portable and lightweight, making it perfect for traveling.
Cons:
- Can be difficult to find replacement parts.
- Can be more expensive compared to some of the other methods.
- May require a certain level of skill to make the perfect cup of coffee.
Tips when using an Aeropress to Make Coffee
- Use a fine grind to prevent the coffee from tasting bitter.
- Experiment with different steeping times to find your ideal cup.
- Use a digital scale to measure the right amount of coffee grounds.
- Clean the Aeropress after each use to prevent flavor transfer and buildup.
- Try adding flavors/spices to the coffee grounds for a distinctive taste.
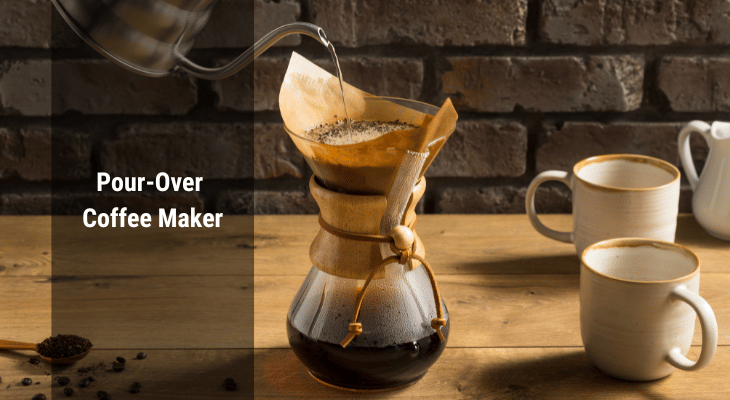
Method 4: Using a Pour-Over Coffee Maker
What You Need
- A pour-over coffee maker (such as a Chemex, Hario V60, or Bee House)
- Coffee beans
- A grinder
- A kettle
- A paper/reusable filter
- A mug/carafe
- A scale (optional, but recommended for accurate measurements)
How To Make Coffee Using a Pour-Over Coffee Maker
- Boil water to the required temperature (typically between 195-205°F).
- Grind coffee beans to a medium-fine grind.
- Place the filter in the pour-over coffee maker and rinse with hot water to remove any paper taste.
- Add ground coffee to the filter.
- Slowly pour hot water over the coffee, starting in the center and spiraling outwards, ensuring that all the coffee is saturated.
- Let the coffee brew for 2-3 minutes.
- Remove the filter and dispose of the grounds.
- Pour the brewed coffee into a mug/carafe.
Pros and Cons of Using a Pour-Over Coffee Maker to Make Coffee
Pros:
- Great for small batches of coffee.
- Easy to control the flavor of the coffee.
- Better for the environment compared to disposable paper filters.
- Portable and lightweight.
Cons:
- Can be time-consuming compared to automatic coffee makers.
- Requires a good pouring technique for optimal results.
- Can be messy.
Tips when Using a Pour-Over Coffee Maker to Make Coffee
- Use freshly roasted coffee beans for the best flavor.
- Experiment with different grind sizes to find your preferred taste.
- Preheat the pour-over coffee maker and mug to maintain the temperature of the brewed coffee.
- Pour slowly and steadily for an even extraction.
Want to brew the absolute best pour-over coffee? Dive into our comprehensive guide where we spill all the beans on making top-notch pour-over coffee using various methods.
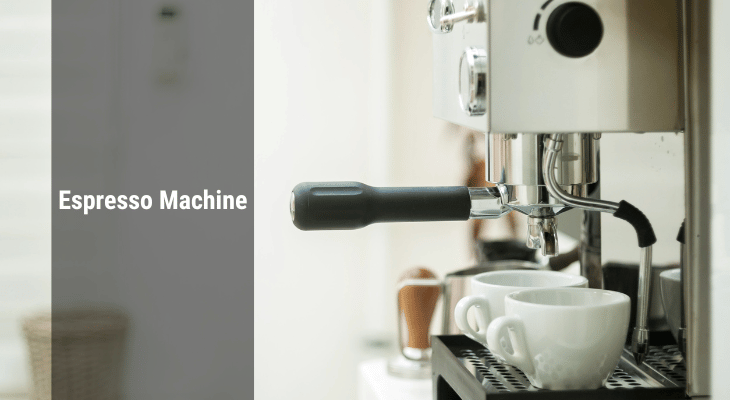
Method 5: Using an Espresso Machine
What You Need
- Espresso Machine
- Whole bean coffee or pre-ground espresso blend
- Tamper
- Portafilter basket
- Grinder (if using whole-bean coffee)
- Water
- Measuring spoon or scale
- Milk frother (optional)
How To Make Coffee Using an Espresso Machine
- Fill the water tank of the espresso machine and turn it on to warm up.
- If using whole-bean coffee, grind the beans to a fine consistency, suitable for espresso.
- Load the ground coffee into the portafilter basket and use a tamper to compress it.
- Attach the portafilter basket to the machine and place a cup under the spout.
- Turn the machine on and press the button to start brewing.
- Wait for the shot of espresso to pour into the cup.
- [Optional] For a cappuccino or latte, use the milk frother to steam and froth the milk, then pour it over the shot of espresso.
Pros and Cons of Using an Espresso Machine to Make Coffee
Pros:
- High-quality espresso shot with crema (foam on top).
- It is versatile and can be used to make various coffee drinks such as cappuccinos, lattes, and macchiatos.
- Consistent results every time.
Cons:
- Expensive compared to other coffee-making methods.
- Requires a learning curve to get the right extraction and temperature.
- Requires regular cleaning and maintenance to keep the machine in good shape.
Tips when Using an Espresso Machine to Make Coffee
- Use high-quality, fresh coffee beans for the best flavor.
- Experiment with different grind sizes and tamping pressures to find the perfect shot.
- Clean the machine regularly to prevent build-up of old coffee oils and residue.
- Preheat the espresso cup to maintain the temperature of the coffee.
- Use a burr grinder instead of a blade grinder for a more consistent grind.
If you’re eager to learn how to make coffee using an espresso machine, check out our comprehensive guide on making espresso at home, whether you have an espresso machine or not.
Method 6: Using a Moka Pot
What You Need
- A Moka Pot in the size of your choice
- Coffee beans, freshly ground
- A heat source (such as a stovetop)
- Water
How To Make Coffee Using a Moka Pot
- Fill the bottom part of the Moka Pot with water.
- Fill the coffee basket with freshly ground coffee and level it out.
- Place the basket into the bottom part of the pot and screw the upper part of the pot onto the bottom part.
- Put the Moka Pot on the heat source.
- Wait for the water to boil and the coffee to start dripping into the upper part of the pot.
- Once the coffee has fully brewed, turn off the heat and let the Moka Pot cool down for a minute.
- Pour the coffee into your mug and enjoy!

Pros and Cons of Using a Moka Pot to Make Coffee
Pros:
- Makes rich, strong coffee that’s similar to espresso.
- Typically compact and don’t take up much space.
- Relatively inexpensive.
Cons:
- Can be tricky to use and require some practice to get the hang of.
- Can be messy and require regular cleaning.
- The coffee produced by a Moka Pot can be bitter if the grind is too fine or the brewing time is too long.
Tips when using a Moka Pot to Make Coffee
- Use high-quality, freshly roasted coffee beans and grind them just before brewing.
- Make sure to clean the Moka Pot regularly to avoid any buildup of coffee oils or mineral deposits.
- Don’t overheat the Moka Pot or let it boil dry, as this can ruin the flavor of the coffee.
- Experiment with different grind sizes to find the right balance between strength and bitterness.
Method 7: Using a SoftBrew
SoftBrew is a coffee brewing device from Italy, designed by George Sowden in 2010. [1] It utilizes a simple infusion technique that involves brewing coffee with a stainless steel filter, which can accommodate a wide range of coffee grinds, from fine to coarse.
What You Need
- A SoftBrew coffee maker
- Coffee beans (or pre-ground coffee)
- Water
- A kettle
- A mug/carafe
How To Make Coffee using a SoftBrew
- Boil water to the desired temperature, usually around 200°F.
- Fill the SoftBrew with coffee grounds, using a medium grind. The ratio of coffee to water should be around 1:16, which is approximately 1 ounce of coffee for every 16 ounces of water.
- Place the SoftBrew on top of your mug or carafe.
- Slowly pour the hot water over the coffee grounds, taking care not to overflow the SoftBrew.
- Let the coffee steep for 3-5 minutes.
- Gently remove the SoftBrew from your mug/carafe, letting the coffee drain through the filters.
- Enjoy your freshly brewed coffee!
Pros and Cons of Using a SoftBrew to Make Coffee
Pros:
- The SoftBrew coffee maker is compact and easy to use, making it a great option for those with limited counter space.
- The coffee made with a SoftBrew has a smooth, balanced flavor, with a relatively low level of bitterness.
- The coffee maker is also easy to clean.
Cons:
- The SoftBrew coffee maker has a limited capacity, so it may not be the best choice if you’re making coffee for a large group.
- The coffee may not be as strong as other brewing methods.
Tips when using a SoftBrew to Make Coffee
- Use freshly roasted coffee beans for the best flavor.
- Experiment with different coffee beans to find your favorite.
- Experiment with the steeping time to find the perfect brewing time for your taste.
- Clean the SoftBrew after each use to ensure the best-tasting coffee.
Method 8: Using a Siphon Coffee Maker (Vacuum Coffee Maker/Vacuum Coffee Brewer)
What You Need
- A Siphon Coffee Maker
- Coffee beans
- A burr grinder
- A heat source (such as an alcohol lamp or electric hot plate)
- Water
- A mug
How To Make Coffee using a Siphon Coffee Maker
- Fill the lower chamber of the Siphon Coffee Maker with water, making sure that the water level is below the bottom of the brew basket.
- Heat the water until it reaches boiling point (212°F).
- As the water is heating up, grind the coffee beans to a medium-fine grind.
- Place the coffee grounds in the brew basket.
- As soon as the water reaches boiling point, remove the heat source and place the brew basket in the lower chamber.
- The vacuum created by the boiling water will pull the coffee up into the upper chamber.
- Once the coffee has been brewed, turn off the heat source. The vacuum created by the cool-down process will cause the coffee to drop back down into the lower chamber.
- Pour the coffee into a cup and serve.

Pros and Cons of Using a Siphon Coffee Maker to Make Coffee
Pros:
- Produces a clean, pure coffee flavor.
- Brews coffee in a controlled environment, resulting in a consistent cup of coffee every time.
- Creates a visually stunning presentation.
Cons:
- Requires a heat source.
- Can be difficult to clean.
- Time-consuming to make a single cup of coffee.
Tips when using a Siphon Coffee Maker to Make Coffee
- Use high-quality, fresh coffee beans.
- Pay attention to the water temperature and make sure that it reaches boiling point.
- Be careful when handling the Siphon Coffee Maker as it can get very hot.
- Experiment with different grind sizes to find the perfect grind for your Siphon Coffee Maker.
- Clean the Siphon Coffee Maker thoroughly after each use to ensure that it is ready for the next use.
Method 9: Using a Coffee Percolator
What You Need
- A coffee percolator
- Coffee grounds
- Water
- Stove or heat source
- Measuring cup
- A mug
How To Make Coffee using a Coffee Percolator
- Fill the bottom part of the coffee percolator with water up to the preferred level.
- Add coffee grounds to the basket in the center of the percolator.
- Assemble the percolator by placing the basket on top of the bottom part.
- Place the percolator on the heat source and let the water boil.
- Once the water reaches boiling point, the coffee will start to percolate and move up through the grounds and into the top part of the percolator.
- Remove the percolator from the heat once the coffee has finished percolating.
- Pour the coffee into your mug and enjoy!

Pros and Cons of Using a Coffee Percolator to Make Coffee
Pros:
- Affordable.
- Portable.
- Easy to use.
- No electricity is needed.
Cons:
- Takes longer to brew compared to other methods.
- Can be difficult to control the brewing temperature.
- Coffee can become bitter if left to percolate for too long.
Tips when using a Coffee Percolator to Make Coffee
- Use good-quality coffee beans.
- Keep an eye on the percolator while it’s brewing to ensure it doesn’t boil for too long.
- Experiment with the coffee-to-water ratio to find your optimal cup.
- Let the coffee cool for a minute before pouring it to avoid burning yourself.
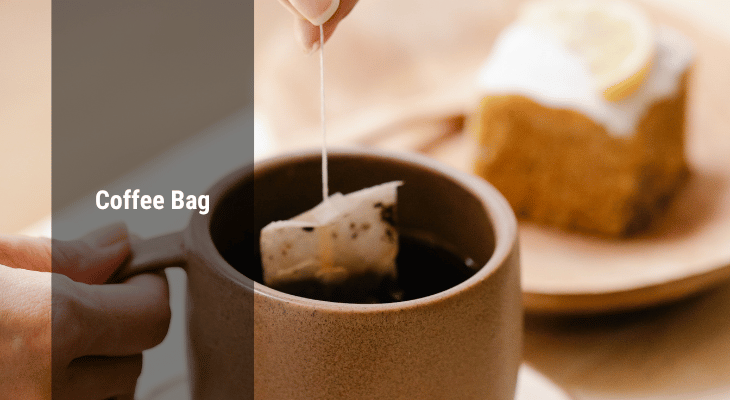
Method 10: Using a Coffee Bag
What You Need
- A coffee bag (Coffee bags come in a variety of flavors, roasts, and strengths, so choose the one you like)
- Hot water
- A mug
How To Make Coffee using a Coffee Bag
- Fill a mug with hot water to preheat it.
- Choose a coffee bag that suits your taste and place it in the mug.
- Pour hot water over the coffee bag until the mug is full.
- Let the coffee steep for 3-5 minutes.
- Remove the coffee bag from the mug.
- [Optional] Add sugar, cream, or any other desired ingredients.
- Enjoy your cup of coffee!
Pros and Cons of Using a Coffee Bag to Make Coffee
Pros:
- Convenient and easy to use.
- Minimal equipment is required.
- Available in a variety of flavors, roasts, and strengths.
- No mess or fuss.
Cons:
- Limited control over the strength and flavor of the coffee.
- May not be as flavorful as other methods.
Tips when using a Coffee Bag to Make Coffee
- Use hot, but not boiling water. Boiling water can extract bitter flavors from the coffee.
- Steep the coffee bag for the recommended time to ensure that the flavor is balanced.
- Store coffee bags in a cool, dry place to preserve their freshness.
- Experiment with different brands and types of coffee bags to find your favorite.
Tips for Making the Best Coffee
For coffee lovers, nothing beats a perfectly brewed cup of coffee. To help you achieve coffee nirvana, I’ve compiled a list of tips for making the best coffee.
1) Choosing the Right Coffee Beans
The first step to making great coffee is to choose the right coffee beans. The quality of your coffee depends on the quality of your beans. When choosing coffee beans, look for high-quality, fresh beans that are grown in an area with the right climate and soil conditions. Additionally, it’s also a good idea to choose coffee beans that are organic and shade-grown, which helps to preserve the environment.
2) Grinding Your Own Beans
Grinding your own coffee beans is the key to unlocking the full flavor potential of your coffee. When you grind your own beans, you can control the size of the grind and the consistency of the grind, which are important factors in determining the flavor of your coffee. If you buy pre-ground coffee, you’re sacrificing flavor and aroma for convenience. So, invest in a good-quality coffee grinder and start grinding your own beans.
3) Storing Your Coffee Beans Properly
Storing your coffee beans properly is crucial to preserve their freshness and flavor. Coffee beans should be stored in an airtight container away from light, heat, and moisture. Furthermore, never store your coffee beans in the freezer or refrigerator, as this will cause them to lose their flavor. If you must store your coffee beans for an extended period of time, try to keep them in a cool, dark place.
4) Water Quality Matters
The quality of the water you use to make coffee can have a huge impact on the flavor of your coffee. Always use fresh, clean water to make your coffee. Avoid using tap water that has a strong taste, as this will affect the taste of your coffee. If you’re using a coffee maker, make sure to clean it regularly to prevent any build-up of mineral deposits or bacteria.
5) Experiment with Brewing Time and Temperature
Finally, don’t be afraid to experiment with brewing time and temperature. Different coffee beans have different brewing requirements, and you may need to adjust your brewing time and temperature to get the best flavor from your coffee. Try brewing your coffee for different lengths of time and at different temperatures to find the perfect combination for your taste buds.
In conclusion, making the perfect cup of coffee is a science and an art. With so many methods to choose from, it can be overwhelming to know where to start. However, with this guide to making coffee using 10 different methods, you now have the information you need to start experimenting and finding the method that works best for you. Each method has its own pros and cons, so it’s up to you to find the one that suits your needs and tastes the most. So go ahead, get started, and discover the world of coffee! Who knows, you might even stumble upon a new favorite brew among the 68 types of coffee available out there.